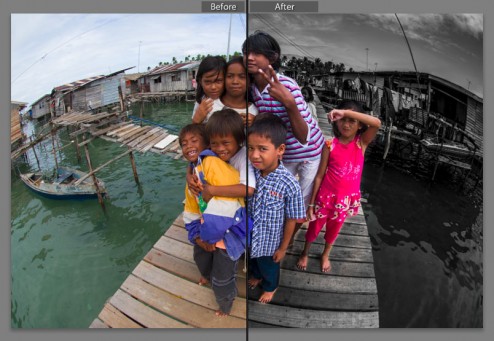
 You might came across photos that look-a-like the one shown above where a certain part of the photo is in grey-scales while the subjects are with the original colors. I called this type of editing method, the “selective desaturation”. So how do you actually make one of these?
 The above photo shown the before and after the editing works. Today, I am going to show how to do it quickly and easily with the powerful ‘Adjustment Brush’ in Adobe Lightroom.
You’ll need Adobe Lightroom 4 & a suitable photograph. Normally, a photo with a clear colorful subject with plan background work best.
Start with selecting your photograph in ‘Library’ mode and go to ‘Develop’ mode in Adobe Lightroom when ready.
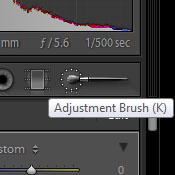
Once you are in the ‘Develop’ mode, activate ‘Adjustment Brush’ from the right panel, or simply press the key ‘K’.
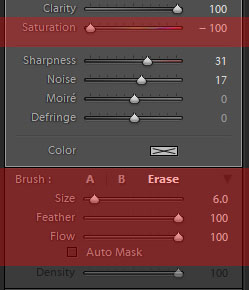
 While ‘Adjustment Brush’ mode is activated, you will be presented with a list of options in the right panel, look for the ‘Saturation’ field and set it to ‘-100‘,
This tells Lightroom that we want to desaturate whichever area that we painted on later. Depend on your photograph, you may also play with the brush-options such as ‘Size’ and ‘Feather’.
For quicker work flows, you may use the short cut keys – ‘[‘ or ‘]’ to adjust brush size, and if ‘Shift’ key is hold when you press ‘[‘ or ‘]’, you are modifying the ‘Feather’ of the painting brush. If you uses a ‘Scroll mouse’, you can scroll up and down to changes the brush size too.
There is another useful option – ‘Auto Mask’ that you might want to experience with, to further enhance the accuracy of your brush-selection.
By turning this option ‘ON’, Lightroom will try to predict and selectively paint area with similar patterns or colors. This works best in area that has fine details. When you need to paint over large area, it is easier to just turn this ‘OFF’.
Once you done your settings, you can now paint over area that you wanted to be desaturated, if you accidentally painted over your main subject which is suppose to be in color, fear not, just press and hold ‘Alt’ to erase the wrong painted area.
In adjustment-brush mode, you can press ‘O’ to turn on the overlay mode that shows the painted area in RED.
Voila, you got yourself a creative photo, check out the before and after for the following shot I made in Semporna, Sabah with a 10.5mm Fisheye lens on a Nikon D600 in DX mode.
The above version is the out of camera, plain boring photo with rather distinctive background.
Selectively desaturate and aggressively toned background make the children standout and in directly make it more interesting (at least to me, duh). I spent about 5minutes making this photo-edit, and another 30mins writing this simple tutorial.
Hope this helps and do share with your friends if you find it interesting.


